

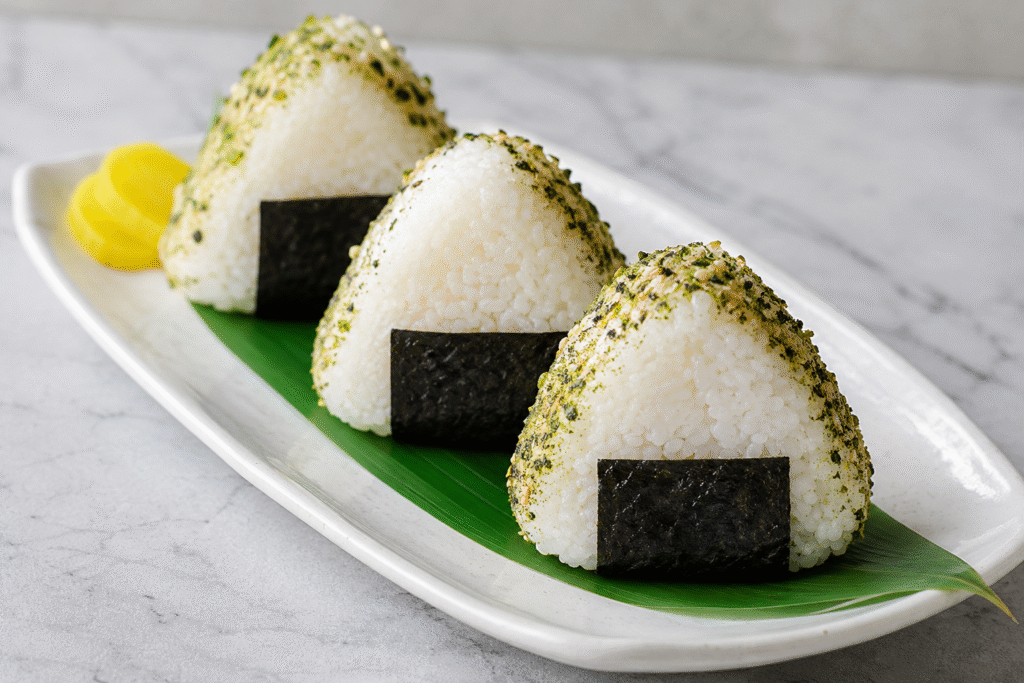
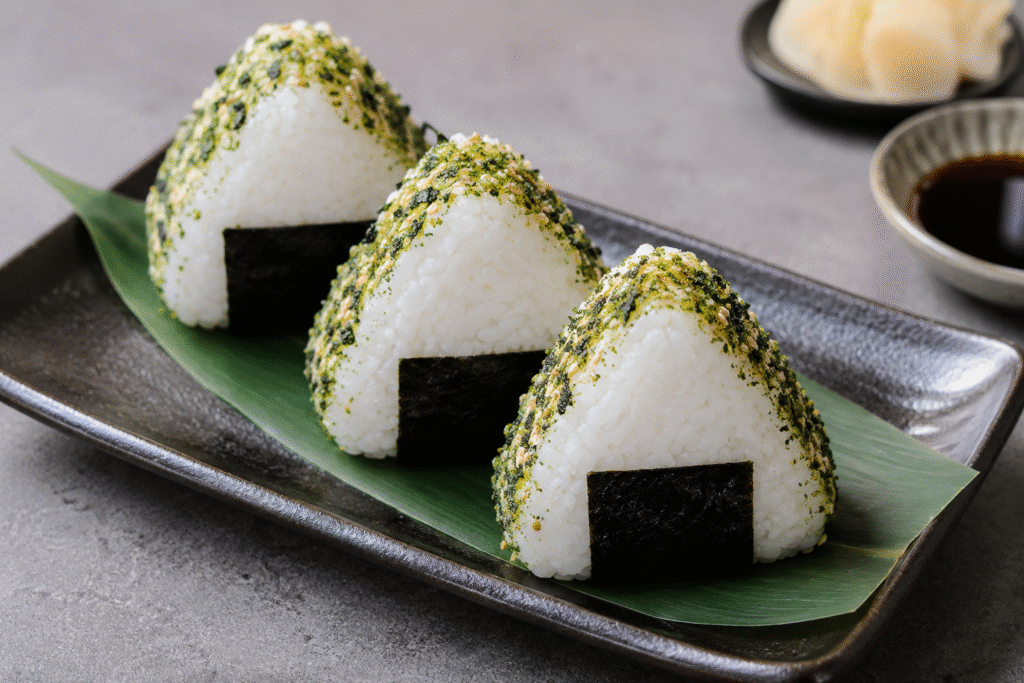
There is something deeply comforting about a perfectly shaped, neatly wrapped Japanese rice ball. Known as Onigiri or Omusubi, these iconic treats are the ultimate comfort food in Japan—and for good reason. They are portable, incredibly customizable, and deliver the perfect balance of seasoned rice and savory fillings in every single bite.
Whether you are packing a bento box for work, looking for a wholesome snack for your kids, or wanting to recreate that Japanese convenience store magic at home, mastering this classic dish is easier than you think.
In this ultimate guide, we will walk you through the foundational techniques of cooking the perfect rice, shaping your creation, and exploring eight spectacular filling variations that will elevate your culinary game.
Perfect Japanese Onigiri (Rice Balls)
Ingredients
Method
- Step 1: Cook the RiceWash: Rinse the rice in cold water 3 to 4 times until the water runs completely clear, then drain.Soak: Let the drained rice sit in a colander for 30 minutes before cooking.Cook: Put rice and 2.5 cups of water in a pot. Bring to a boil, then cover with a lid, turn heat to low, and simmer for 12-15 minutes.Steam: Take the pot off the heat. Keep the lid on and let it steam for 10 minutes. Fluff with a spatula and let it cool slightly until warm.Step 2: Make the FillingTuna Mayo: Mix the drained tuna, Kewpie mayo, soy sauce, and black pepper in a small bowl until smooth.Teriyaki Chicken: Stir chicken, teriyaki sauce, and ginger in a pan over low heat for 2 minutes. Stir in green onions and let it cool.Step 3: Shape and WrapPrep Hands: Wet your hands with water and rub a pinch of sea salt across your palms.Fill: Take $1/3$ cup of warm rice in your hand, make a small well in the center, and add 1-2 teaspoons of filling.Shape: Fold the rice over the filling. Cup your hands together to gently mold the rice into a tight triangle shape.Wrap: Stick a strip of nori seaweed at the bottom of the triangle. Serve immediately or wrap in plastic cling wrap for later.
Master the Basics: The Ultimate Easy Onigiri Recipe for Beginners
Before diving into fillings, you must master the foundation: the rice. You cannot use standard long-grain white rice or jasmine rice for this; they lack the starch necessary to hold the shape. You must use short-grain Japanese rice (often labeled as sushi rice).
Ingredients for the Base Rice
- 2 cups Japanese short-grain rice
- 2.5 cups filtered water (plus extra for washing)
- 1.5 tablespoons Fine sea salt (kept in a small bowl for your hands)
- 2-3 sheets Nori (seaweed), cut into thick 1-inch strips
- Optional: Furikake (Japanese rice seasoning) for rolling
Step-by-Step Instructions
- Wash the Rice: Place the rice in a large bowl and rinse it with cold water. Gently swirl the grains with your fingers. Drain the cloudy water and repeat 3 to 4 times until the water runs completely clear. This removes excess surface starch and prevents the rice from becoming gummy.
- Soak: Drain the rice completely in a colander and let it sit for 30 minutes. This allows the moisture to penetrate the core of each grain for even cooking.
- Cook the Rice: Transfer the rice and 2.5 cups of water to a heavy-bottomed pot or a rice cooker. If using a pot, bring it to a boil over medium-high heat, then immediately drop the heat to low, cover with a tight-fitting lid, and let it simmer for 12 to 15 minutes.
- Steam: Remove the pot from the heat (keep the lid on!) and let it steam undisturbed for another 10 minutes. Gently fluff the rice with a rice paddle. Let it cool slightly until it is warm enough to handle comfortably but not cold.
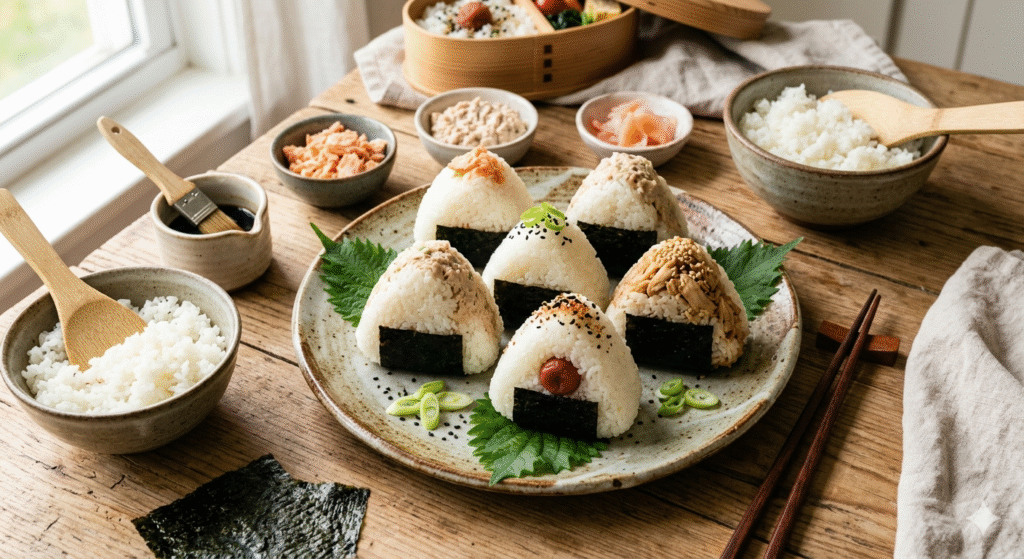
Flavor Packets: Creative Onigiri Filling Recipe Ideas You Must Try
The true joy of making Japanese rice balls lies in the surprise hidden at the center. While traditional fillings often lean toward salty or sour notes—like umeboshi (pickled plum) or salted salmon—modern kitchens love experimenting with richer, savory proteins. The key to a successful filling is ensuring it isn’t too wet or watery, which can cause your beautifully shaped rice ball to fall apart from the inside out.
The Crowd Favorite: Creamy Tuna Mayo Onigiri Recipe
Go into any 7-Eleven or Lawson in Tokyo, and you will see shelves stocked with this specific flavor. It is arguably the most popular modern variation because the creamy, savory filling pairs perfectly with the clean flavor of the rice.
Ingredients
- 1 can (5 oz) Tuna (drained thoroughly)
- 2 tablespoons Kewpie Japanese mayonnaise (regular mayo works, but Kewpie adds a distinct umami sweetness)
- 1 teaspoon Soy sauce
- A pinch of ground black pepper
Instructions
- In a small bowl, flake the drained tuna with a fork.
- Mix in the Kewpie mayonnaise, soy sauce, and black pepper until completely smooth and well combined. Set aside.
Savory & Protein-Packed: Onigiri Recipe Tuna Variations
If you love the depth of fish fillings but want to move beyond basic mayo, trying alternative seafood preparations can take your cooking to the next level.
Ingredients
- 1 cup Cooked tuna flakes
- 1 tablespoon Sriracha hot sauce
- 1 teaspoon Toasted sesame oil
- 1 tablespoon Toasted white sesame grains
Instructions
- Combine your flaked tuna with the Sriracha and toasted sesame oil to create a fiery, smoky variation.
- Mix in the white sesame grains for an added nutty crunch that complements the texture of the soft rice beautifully.
Ultimate Comfort Food: Classic Onigiri Recipe Chicken Fillings
For a hearty, deeply satisfying option that mimics a comforting home-cooked dinner, a sweet-and-savory chicken filling is an absolute game-changer.
Ingredients
- 1 cup Shredded cooked chicken breast or thigh
- 1.5 tablespoons Teriyaki sauce (thick style)
- 1/2 teaspoon Freshly grated ginger
- 1 Green onion, finely chopped
Instructions
- Toss your finely shredded chicken in a small pan with the teriyaki sauce and freshly grated ginger over low heat for 2 minutes until the sauce glazes the chicken completely.
- Stir in the chopped green onions, remove from heat, and let it cool completely before using it to stuff your rice.
Plant-Based Perfection: Fresh & Flavorful Onigiri Recipe Vegetarian Styles
Vegetarian styles offer some of the most vibrant, clean, and traditionally authentic flavor profiles available.
Ingredients
- 1 cup Edamame beans (shelled, steamed, and roughly chopped)
- 1.5 tablespoons Miso paste (White or Awase miso)
- 1 teaspoon Mirin (Japanese sweet rice wine)
- 2 tablespoons Shiso leaves (or fresh mint), finely chiffonaded
Instructions
- Whisk the miso paste and mirin together in a small bowl until smooth.
- Toss the chopped edamame and fragrant shiso leaves into the miso mixture until evenly coated, creating a bright green, savory filling.
The Hawaiian-Fusion Twist: Savory Onigiri Recipe Spam Fillings
Inspired by the famous Hawaiian Spam Musubi, integrating this crispy, caramelized protein into a standard rice triangle creates a wonderful fusion snack.
Ingredients
- 4 slices of Spam, cut into small 1/2-inch cubes
- 1 tablespoon Soy sauce
- 1 tablespoon Sugar
Instructions
- Fry the diced Spam cubes in a non-stick skillet over medium-high heat until they develop a crisp, golden-brown crust on all sides.
- Pour the soy sauce and sugar over the hot Spam, stirring rapidly for 1 minute until the glaze thickens and caramelizes around the meat. Allow it to cool.
Fun & Wholesome: The Best Cute Onigiri Recipe for Kids and Bento Boxes
If you are packing lunches for school, making food look visually appealing can encourage picky eaters to dive right in. This kid-friendly version focuses on mild, gentle flavors and fun presentations.
Ingredients
- 1 cup Warm cooked short-grain rice
- 1 tablespoon Sweet corn kernels (drained and patted dry)
- 1 tablespoon Finely grated carrot
- Small pieces of Nori cut into circles for eyes and smiles
Instructions
- Gently fold the sweet corn and colorful grated carrot directly into the warm rice mixture before shaping. This distributes bright pops of color throughout the ball.
- Shape the rice into small, manageable rounds rather than large triangles. Place tiny pre-cut nori shapes onto the outside of the rice to create cheerful, adorable faces.
Assembly: How to Shape and Assemble Your Rice Balls
Now that your rice is cooked and your fillings are prepared, it is time to assemble!
The Hand-Shaping Method:
- Wet Your Hands: Set up a clean station with your bowl of warm rice, your chosen fillings, a bowl of water, and your sea salt. Wet your hands thoroughly with water to prevent the rice from sticking to your skin.
- Salt Your Palms: Rub a generous pinch of fine sea salt across your wet palms. This seasons the exterior of the rice ball evenly and helps preserve it.
- Create the Base: Scoop roughly $1/3$ cup of warm rice into one hand. Create a shallow indentation or well right in the center of the rice clump.
- Add Filling: Place 1 to 2 teaspoons of your desired filling (like the Creamy Tuna Mayo or Teriyaki Chicken) into the well.
- Enclose: Gently fold the surrounding rice over the filling to completely enclose it. Add a tiny pinch of extra rice on top if the filling is exposed.
- Shape: Cup your hands to form a triangle. Press firmly but gently—do not squeeze too hard or compress the rice into a dense brick. You want the grains to just adhere to one another. Turn the ball a few times to smooth out the three distinct edges.
- Wrap: Wrap a strip of crisp nori around the bottom center of the triangle to act as a built-in handle for your fingers.
Pro-Tips to Perfect Your Onigiri Recipe: How to Store, Wrap, and Serve
- Keep the Nori Crisp: If you are packing these for later, do not wrap the seaweed around the damp rice immediately, or it will turn soggy. Wrap the rice triangle tightly in plastic wrap first, and keep the nori separate in a small bag. Wrap it right before you eat for maximum crunch!
- Never Refrigerate Naked Rice: Putting uncovered rice balls in the fridge makes the grains hard, dry, and chalky. If you must store them overnight, wrap each individual triangle tightly in plastic cling wrap, then place them inside a sealed airtight container in the warmest part of your refrigerator.
- Revive Before Serving: If your stored rice ball feels a bit stiff, pop it into the microwave for a brief 10 to 15 seconds. This relaxes the starches, restoring that signature soft, fluffy texture.
FAQs
What is the best type of rice to use for an onigiri recipe?
You must use a high-quality Japanese short-grain white rice. Medium-grain rice can work in a pinch, but long-grain varieties like Jasmine or Basmati do not contain enough sticky amylopectin starch to hold a molded shape together.
Can I make these ahead of time for meal prep?
Yes! You can easily shape the rice triangles the night before. Be sure to wrap them tightly in plastic wrap to keep the moisture sealed inside, and always store your seaweed strips separately so they stay crunchy until lunch.
Why is my rice falling apart when I try to shape it?
This usually happens for two reasons: either the rice was not rinsed enough to remove excess loose starch, or the rice has cooled down too much. Rice must be comfortably warm when shaping, as the starches lock together best when heat is present.
Do I have to use raw fish for the filling?
Not at all. In fact, most popular variations rely on fully cooked or preserved shelf-stable ingredients, such as canned tuna, shredded teriyaki chicken, fried savory spam, or pickled vegetables.
Conclusion
Mastering a classic onigiri recipe is a rewarding culinary skill that brings a taste of authentic Japanese comfort straight to your home kitchen. By focusing on quality short-grain rice, keeping your hands properly dampened and salted, and selecting flavorful fillings like rich tuna mayo or savory teriyaki chicken, you can create beautiful, nourishing snacks that look just as incredible as they taste. Don’t be afraid to experiment with different shapes and seasoning blends to make these delightful rice triangles completely your own!
