
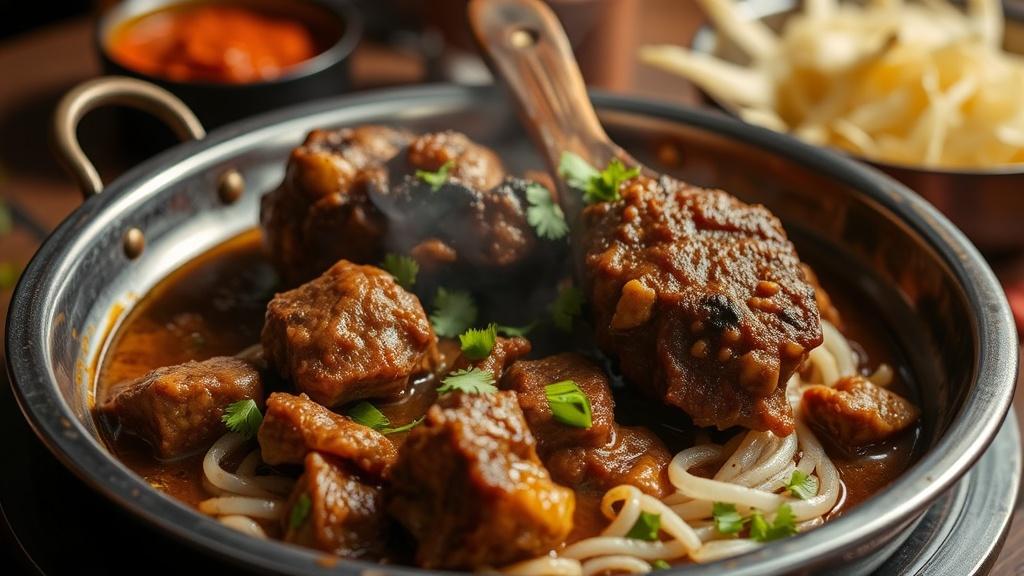
The first time I smelled the heat and spice of a karahi, it felt like an invitation—aromatic steam curling up from a shallow, rounded pan and filling the air with garlic, tomato, and charred ginger. That memory sits at the heart of this article: a deep, practical dive into a beloved South Asian specialty, its flavors, techniques, and ways to make it sing at home. Read on for history, ingredients, step-by-step cooking, variations, tips, and a few stories from my own kitchen experiments.
Before you knot your towel and pull out a heavy skillet, know that this dish is more forgiving than it appears. It rewards attention rather than perfection, and small practice runs will teach you how to coax bold flavor from simple components. I’ll show both traditional and modern shortcuts, and explain how tiny adjustments—timing, heat, and fat—change everything.
what is a karahi and why it matters
A karahi is a round, deep-sided pan used across South Asia, and the name also describes the style of cooking associated with it: fast, hot, and typically finished with a flourish of fresh aromatics. The method favors high heat and a shallow pool of cooking fat, which helps sear meat quickly while preserving juiciness. In restaurants the pan’s large surface area encourages browning and the slight charring that many fans love.
When lamb or goat is cooked this way—what many call mutton in culinary terms—the result is a dish built on contrasts: tender meat, bright tomato, warm spices, and a finishing touch of fresh ginger or cilantro. The interplay of those notes is what makes the dish memorable and why families often save it for gatherings and special evenings. It’s both everyday comfort and festive centerpiece.
origins and cultural background
The karahi style evolved in the kitchens of northern India and Pakistan, where the pan’s shape suited quick, communal cooking over open fires. Street vendors, home cooks, and banquet chefs all adapted the technique to local tastes, adding regional spices and ingredients. Over decades, the recipe traveled with migration and trade, becoming a staple in South Asian restaurants worldwide.
Culturally, the dish carries social weight: in many Pakistani and North Indian households, a well-made karahi signals hospitality. It’s the kind of meal you bring to someone when you want to celebrate or console, to mark a wedding, or to welcome a guest. That social dimension is part of the flavor profile—the context gives the food warmth.
choosing the right meat
Meat selection shapes the entire cooking process. In this cuisine, “mutton” typically refers to mature sheep or goat, which has a more pronounced flavor than lamb. When shopping, look for bone-in cuts; they release marrow and collagen that enrich the sauce. Shoulder, neck, and shanks are excellent choices because they tolerate high heat and slow braising without drying out.
Fat matters. A little exterior fat helps the meat brown and deepens the sauce, but too much can make the dish greasy. If you buy a whole cut, trim judiciously, leaving some fat and connective tissue. For faster cooking or a leaner profile, you can mix fattier cuts with leaner ones, or partially trim and save the rendered fat for toasting spices.
fresh versus frozen—what to consider
Fresh meat is preferable for texture and predictable cooking times, but high-quality frozen cuts can work well if thawed slowly in the refrigerator. Rapid thawing can cause uneven texture and increased surface moisture, which interferes with browning. If you must use frozen meat, plan extra time to dry it before searing.
One trick I learned was to pat the pieces dry, then leave them uncovered in the fridge for a few hours to firm up. That surface dryness encourages a better sear and a cleaner fond—those caramelized brown bits that form on the pan and become the backbone of the sauce’s flavor.
spices and aromatics that define the profile
The spice mix for a karahi is deceptively simple: cumin, coriander, red chili, and garam masala often play central roles. Fresh garlic and ginger provide a pungent base, while tomatoes add tang and body. Green chilies and cilantro give a finishing brightness, and a squeeze of lemon at the end can lift the whole plate. The real magic is in the timing of when each element meets the heat.
Toasting whole spices briefly in hot oil awakens essential oils and deepens their flavor. Ground spices are typically added later to prevent burning. Many home cooks balance heat with acidity—more tomato or a dash of yogurt helps cut richness, depending on preference. Experimenting with small adjustments gives you a personal signature.
an essential spice pantry
Keep these staples on hand for authentic results: cumin seeds, coriander powder, turmeric, red chili powder, and garam masala. Fresh ginger and garlic should be abundant. Whole spices like green cardamom, cloves, and bay leaves are optional but lend depth for special occasions. A jar of crushed dried red chilies can substitute for fresh when necessary.
Good-quality spices make a noticeable difference. If you have the budget, buy smaller quantities more often and store them in airtight containers away from heat and light. Freshly ground spices will yield more vibrant flavor than powders that have sat on a shelf for months.
equipment: the pan, knives, and heat sources
A true karahi is wide and rounded, typically made of cast iron or carbon steel. That shape encourages rapid evaporation, which concentrates flavor while keeping meat moist. If you don’t have one, a heavy-bottomed skillet or Dutch oven will do the job, but be mindful that deeper pots hold moisture and may require a slightly different approach to achieve the same charred notes.
Sharp knives matter. Uniform pieces of meat cook evenly, so take time to cut shoulder or leg into bite-sized portions. A sturdy spatula or metal spoon will help you scrape the fond from the bottom of the pan; those browned bits are flavor gold. Lastly, control your heat source: a gas stove or outdoor burner gives quick response, while electric coils need a little patience and adjustment.
when to use a pressure cooker or slow-cooker
Traditionalists prefer the open-pan method, but pressure cookers and slow-cookers are useful for time-crunched cooks. A pressure cooker can dramatically reduce cooking time while producing tender meat, though it sacrifices some of the deep browning you get on high heat. If you use one, brown the meat first in a separate pan or in the pressure cooker on high to salvage flavor.
Slow-cookers are excellent for hands-off preparation and yield a silky sauce, but you may miss the crisped, slightly charred edges that give the dish its signature texture. A hybrid approach—slow-cook to tenderize, then finish in a hot skillet—combines convenience with flavor intensity.
step-by-step: a classic method you can follow
Below is an approach that balances traditional technique with practical tips for home kitchens. I’ll describe the core process first, then offer variations and timing adjustments. Read the list through once before you begin cooking to get the rhythm in your head; karahi rewards anticipation.
For the recipe I use at home, quantities assume four to six servings and can be scaled up. The table later lists ingredients and rough measures if you prefer a cookbook-style layout to follow while cooking.
preparation and mise en place
Trim, cut, and season the meat lightly with salt and a pinch of turmeric. Peel and mince garlic and ginger, slice onions if using, chop tomatoes roughly, and slit green chilies. Keep a bowl for discarded fat and another for your aromatics so everything is within arm’s reach; high-heat cooking doesn’t leave time for hunting down utensils.
Heat your pan until it’s hot but not smoking. Add a couple of tablespoons of oil or clarified butter; ghee delivers a richer result but is optional. Toast whole spices for a few seconds, listening for a pop or snap—the aroma should bloom quickly without burning.
browning and building layers
Work in batches to avoid crowding the pan, which causes steaming rather than browning. Lay pieces flat and leave them undisturbed for a minute or two until they release easily and show good color. Flip and repeat until all sides have deepened, then remove to a resting plate. That fond will become the backbone of your sauce.
Return the pan to medium heat, add a little more fat if needed, and sweep in chopped garlic and ginger. Cook briefly, then add tomatoes and a pinch of salt. Let the mixture reduce until oil begins to separate; that’s a critical signal that the tomato has cooked down and concentrated its flavor.
braising to tenderness and finishing touches
Reintroduce the browned meat to the pan and add a splash of water or stock to create a shallow braise. Cover partially and simmer until the meat is tender—this could take anywhere from 30 minutes to an hour depending on the cut and size. Stir occasionally, scraping the pan to incorporate browned bits into the sauce.
When the meat is nearly done, increase the heat and cook uncovered to thicken the sauce and deepen the color. Finish with chopped cilantro, julienned ginger, and sliced green chilies. A final shower of garam masala or a squeeze of lemon brightens the dish right before serving.
ingredients table: a simple shopping list
| Ingredient | Quantity (approx.) |
|---|---|
| Bone-in mutton cuts (shoulder/neck) | 2–3 lbs (1–1.5 kg) |
| Tomatoes, ripe | 3–4 medium |
| Garlic | 6–8 cloves |
| Fresh ginger | 2–3 inches, plus extra for garnish |
| Green chilies | 2–4, to taste |
| Oil or ghee | 3–4 tbsp |
| Ground cumin, coriander, red chili | 1–2 tsp each |
| Salt | To taste |
| Fresh cilantro | Handful |
regional and contemporary variations
Although the core technique remains similar, regional interpretations vary widely. In Lahore, cooks may favor a heavier, tomato-forward sauce with pronounced red chili and a liberal finishing of butter. Karachi-style preparations can be simpler, leaning on whole green chilies and minimal tomato to let the meat shine. In Lucknow, you’ll find subtler spicework and a silkier texture influenced by Mughlai cuisine.
Modern chefs experiment with smoky elements—charred tomatoes or a quick stint on the grill adds an attractive complexity. Some home cooks add yogurt or cream to soften the acidity, while others incorporate fenugreek for a slightly bitter counterpoint. These variations reflect personal taste and available ingredients more than rigid rules.
vegetarian and seafood twists
The karahi technique adapts well to vegetables and seafood. Paneer, mixed bell peppers, and mushrooms make an excellent vegetarian karahi when stirred over high heat until edges caramelize. For seafood, shrimp or firm white fish cooks quickly and benefits from the same bold aromatics, though you’ll need to reduce simmering time to prevent toughness.
Using a vegetable or seafood base can also be a gateway for cooks who want the karahi aesthetic without red meat. The hallmark is the high-heat sear and the final aromatic garnish, which translate cleanly across proteins and produce.
serving suggestions and accompaniments
This style of cooking pairs beautifully with simple breads and rice. Hot naan, flatbread, or paratha are perfect for mopping up the sauce, and a platter of steamed basmati balances the richness. A side of thinly sliced onions tossed with lemon and chaat masala adds a bright, palate-cleansing crunch.
For a typical family meal, I lay out a shallow karahi in the center, surrounded by small bowls: yogurt-dill raita, a crisp salad, lemon wedges, and pickled vegetables. Guests can assemble bites to their liking, which keeps the meal interactive and convivial.
beverages and pairing ideas
Light lagers, crisp lagers, and citrus-forward beers complement the spices without overwhelming them. For wine drinkers, off-dry Riesling or a fruity Grenache can handle heat and spice while providing a refreshing counterpoint. Nonalcoholic pairings like salted lassi or iced lemon-mint also work well, especially when the dish is rich or spicy.
If you’re hosting a multi-course meal, consider serving a tart, acidic salad first to prime the palate. The contrast makes the main course feel more vibrant and reduces the sense of heaviness after a large portion of meat and bread.
health, nutrition, and dietary notes
This dish is protein-rich and can be high in fat depending on the cuts used and the amount of added oil. Choosing leaner cuts and trimming excess fat reduces overall calories while preserving flavor. Substituting a lighter oil and moderating portion sizes are simple ways to make the dish fit a balanced diet.
For those monitoring sodium, be mindful of added salt and the presence of preserved ingredients like ghee or commercial spice blends. Fresh tomatoes, herbs, and moderate use of chilies boost flavor without extra sodium. Vegetables served alongside increase fiber and make the meal more rounded nutritionally.
allergy and dietary substitutions
Common allergens are minimal in a traditional recipe, but if you use ghee, clarify whether dairy is an issue for guests. For a dairy-free version, stick to neutral oil. Those avoiding nightshades can substitute roasted carrots and pureed pumpkin for tomato, adjusting spices accordingly to retain depth and acidity.
If you prefer a lower-carb approach, serve the dish over cauliflower rice or with a side of grilled vegetables instead of bread and white rice. Small swaps like these preserve the character of the dish while aligning it with dietary goals.
practical tips and troubleshooting
One frequent problem is a watery sauce. If that happens, increase heat at the end and cook uncovered, stirring to reduce liquid and concentrate flavor. Another common issue is bitterness from burnt spices—avoid adding ground spices to searing-hot oil without moisture and watch for color changes closely.
Undercooked meat usually indicates insufficient simmer time or cuts that are too large. If pieces remain firm after the suggested cooking window, add a small amount of liquid and continue to simmer until tender. Conversely, overcooking can dry out lean cuts; use fatty cuts or reduce simmering once the meat nears doneness.
- Always dry meat before searing to promote browning.
- Toast whole spices briefly in oil rather than in a dry pan.
- Layer flavors—don’t add all spices at once; temper them across stages.
- Finish with fresh aromatics to keep the dish vibrant.
storage, reheating, and making ahead
This dish reheats well because the sauce acts as a buffer against drying out. Store leftovers in an airtight container in the refrigerator for up to three days, or freeze portions for longer shelf life. Reheat gently on low, adding a splash of water or stock if needed to loosen the sauce and prevent scorching.
Making the dish a day ahead is a great option—the flavors often marry and deepen overnight. If you plan to serve it the next day, finish the fresh garnishes—ginger, cilantro, and chilies—just before reheating so they retain brightness. For buffet-style serving, keep warm in a shallow pan over low heat and stir occasionally.
personal reflections and a few kitchen stories
My first attempt at this style ended with a messy pan and a kitchen timer ignored; I learned the hard way that high heat is unforgiving. After a few burned garlic episodes, I developed a habit of keeping the flame bright but responsive, ready to back off at the first hint of smoke. That simple adjustment saved many meals.
At a family gathering, I once made a double batch for a group of twenty. The key was staging: brown in batches, then combine everything in a large braising pan to finish. Guests kept coming back for seconds, and a cousin declared it the best karahi she’d had outside Pakistan. Those moments—food turning strangers into friends—are why I keep returning to this recipe.
mistakes worth making during practice
Don’t be afraid to experiment and fail once or twice. Over-spiced trials teach restraint; undercooked attempts sharpen your sense for timing. Keep a small notebook or take photos of each run so you can track what worked and what didn’t. Iteration is how you develop your signature version.
One practical experiment that paid off: trying charred tomatoes for a smoky undertone. Slightly blackened tomato skins add complexity without extra work, and they’ve become a lab favorite in my kitchen. Little adjustments like that are how you make the dish your own.
final serving day: plating and presentation
Serve the karahi in a shallow dish or the pan itself for rustic charm, arranging the pieces so everyone can reach them easily. Garnish with a generous scattering of ginger matchsticks, chopped cilantro, and a few sliced green chilies for color and sting. Place lemon wedges on the side for guests who like an extra citrus kick.
Offer small bowls for bones and napkins—this is a tactile meal best enjoyed with hands or warm bread for scooping. If you’re presenting it as part of a multi-course dinner, surround it with milder sides so it remains the star without competing with similarly bold flavors.
Making this dish at home is less about following rigid rules and more about developing rhythm: control the heat, layer flavors, and taste as you go. Over time you’ll learn which spices and timing choices create the balance you prefer, whether that means fiery heat, tangy tomato, or herbaceous finish. Invite a friend or two, share the pan, and let the aromas do the rest.

